This guide, as with others, is of specific interest if you are primarily going to Ecuador & Galapagos for photography rather than as a tourist interested in wildlife. Although covering digital still photography much of it is relevant to movie photography as well. It’s not exhaustive in detail but covers most of the areas that you need to consider.
Much has been written about Galapagos photography in particular and I spent a lot of time reading information from people who categorically stated that long lenses were totally unnecessary as most of the wildlife virtually perches on the end of your lens or can be trodden on if not careful.
To a large extent this is true but I’m extremely grateful that I completely ignored it!


You can undoubtedly secure some fine photographs of Boobies (the birds), Sea lions, Iguana, Flightless Cormorants and numerous other examples of wildlife, simply by stepping foot on any one island. The wildlife for the most part will not move – but more importantly, you’re restricted to where you can go – and hereby, in my opinion, lays the problem. Your movements, quite rightly, are restricted to pathways and tracks that meander around the islands so that you do not encroach on breeding areas and nesting sites. Sometimes, if you’re fortunate, these will be alongside the pathways and sometimes the wildlife will have nested or moved close by.
The point here is that you will be taking exactly the same photographs (but with much more skill and style of course) than everyone else who sets foot on the island within a given timescale. Quite often activity and/or specific species appear at other locations than conveniently alongside you. More frequently, if you desire shots of birds in flight, swimming Iguana, nesting Cormorants, diving Pelicans, wading Flamingos, belligerent land Iguana or the smaller skittish finch-sized birds, then you’re going to need much longer lenses. You’ll also secure shots that everyone who read the ‘short lens only’ advice won’t stand a chance of getting.
As I’ve said elsewhere, most of the kit I use is/was expensive but compared with travel to exotic places it pales into insignificance, so I try not to scrimp as I know I’ll regret it later. It’s easy to say ‘spend money’ but it really is the best solution if you’re going into Galapagos in particular and really want to get the best photographic results. The more you compromise on kit, transport and access, the more of a compromise will be the results – but it’s a very personal decision. I hope this guide helps.
General principles
In mainland Ecuador, Cloud Forest and Amazonia, depending on location, you’ll probably split your time between car, boat, canoe and on-foot travel; time in camp resting, eating, downloading images or sleeping – all to slightly varying timescales.
More often than not you’ll rise at dawn and have a light breakfast to be out by sunrise. The time you’ll spend out is largely determined by the amount and suitability of light. This varies from nowhere near enough in the Cloud Forest, to far too much in Galapagos.
You’ll probably want to allocate the middle part of the day for downloading or backing up what you’ve already taken, charging or replacing batteries, cleaning equipment and perhaps grabbing a nap, so that by mid-afternoon you’re ready for a quick tea prior to heading out again until sunset.


It’s a similar pattern in Galapagos but in our case followed a breakfast/dry or wet landing ashore/return to ship/lunch/rest/deep or shallow water snorkel/dry or wet landing ashore. The pattern changed daily and we didn’t always return to the ship between snorkelling and landing ashore or vice versa. In this event you’ll need to speak to the crew so that you can plan what kit to take with you when disembarking.
In Amazonia you’ll be offered night treks, which whilst fascinating offer limited opportunities for photography and for me anyway provided a bit of a break – to actually look at wildlife other than through a lens.
Once again, how rewarding your time in Ecuador and Galapagos will be is largely down to your own pre-planning and falls under the following headings:
Transport
Whilst in Ecuador you may have more say about your mode of transport and there’s obviously a degree of freedom anyway if on foot or if you’ve reserved a kayak or canoe to go out on your own.
In Galapagos it’s important that you declare your interest in photography from home when booking your trip in order to make sure that, where possible, you are included in a R.I.B. or Zodiac that has like-minded people on board when visiting islands. This isn’t quite so important when going ashore (except that you might go ashore sooner by arrangement as a group to catch better light, as some tourists don’t like being sent ashore before a leisurely breakfast irrespective of the light conditions) but once ashore the keen photographers will tend to benefit from a guide more accustomed to waiting for the right shot. A mixed group becomes strung out and the guide becomes more anxious about losing people!
It’s unlikely that if you’re participating on one of the regular ships that ply the Galapagos that you’ll be able to negotiate a Zodiac and guide to yourself – simply because of limited resources on board and the demand for them to take groups.


Absolutely invaluable is a first class guide who’s attuned to the needs of photographers for position, light and quiet. You’ll no doubt quickly attune yourself to those guides more interested in photography, or more knowledgeable, as the tour progresses.
You’re generally encouraged to stay on the tracks when on foot in the Cloud and Amazon Rainforest areas, more for your own protection than preservation of the forest, as stepping on the wrong thing or in the wrong place can have serious repercussions. It’s an absolute must in the Galapagos and walking areas are well marked and policed by your guides.
Equipment stability
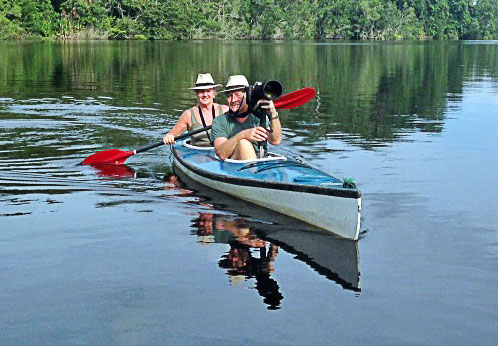
I’ve found that tripods are an encumbrance in the Galapagos and of limited use in the Cloud Forest and Amazonia unless you’re setting up a hide or will remain stationary for some time. I found a monopods very useful in all three places for a) stabilising a heavy camera/telephoto lens in a kayak b) supporting the same onshore in the Galapagos and c) once again in the Cloud Forest whilst waiting for the shifting mists to clear. I find a monopod much quicker to manoeuvre and reposition than a tripod.
As I’ve already mentioned in my safari notes, you can do an awful lot of reading up on the efficiency of VR lenses and despite owning them I now shoot for the most part with it switched off! Without getting too technical, the technology used to ‘double think’ or compensate for movement can often introduce a very slight softness at certain shutter speeds. I’ve found by far and away the best and most reliable solution is to pre-set my camera bodies not to shoot at a shutter speed slower than the focal length of the lens I’m using; compensation for lower light being made by a corresponding automatic increase in ISO speeds up to a pre-set limit. Have a dekko at your camera manual, probably under ‘ISO sensitivity.’ This obviously works best on faster lenses where there’s greater latitude afforded by wider apertures.
In extreme low light situation s that you’ll encounter in the Cloud and Rainforest areas – sometimes throughout the whole day you will find with this method that you’ll be shooting at quite high ISO numbers that err on the side of ‘noisy’. You can limit the level to which the ISO numbers will escalate before the camera will reduce shutter speeds below your pre-sets and I still prefer this to the results with VR. Theirs is probably irrefutable proof one way or the other on this subject but ultimately it’s what you’re happiest with that gives the results you seek. I’ve certainly been happy with handholding even my 200-400mm and getting very sharp images with limited ‘noise’.
In the forest areas you will undoubtedly experience some degradation in the quality of picture that you might have expected in full spectrum light.
Many advocate flash in the jungles but once again, I find this an intrusion and have not been over impressed with the results I’ve seen.
Equipment – care
Other than the normal intrusions of dust that none would expect anywhere, the biggest enemy for your kit will be sea water, humidity, rain, damp and any other precipitation – water in all its forms!
I considered one of the only ways to deal with this effectively was to plan ahead in two ways.
- Use more than one camera body and have a primary choice of lens on each that stays on the body as much as possible. I tended to keep my 200-400mm f4 on one body and the 70-200mm on the other, only changing that one for my 14-24mm if absolutely necessary – I barely used the 14-24mm and could actually have left it behind.
- An excellent fully waterproof carrying bag will be invaluable not only for storing your kit (I kept mine in it for some time after returning to our hotel room or cabin to allow a steady readjustment of temperature rather than subject the gear to tropical/air conditioning contrasts too rapidly which only lead to condensation fogging) but also for transporting it.
You will frequently ( if you’re keen) be crossing streams and rivers in the forests and wading ashore in the Galapagos – neither of which will do your kit much good if you stumble. I researched quite a lot before we went and chose an excellent bag from ‘Overboard’. I chose one of the largest given the volume of gear I have but several sizes are available. I was surprised at how many people carried exposed cameras onto the Zodiacs and then spent most of their time trying to hide them under jackets or T-shirts. One chap managed to slip on wet rocks and dropped his. The bag doesn’t afford absolute protection from knocks but there’s no substitute for keeping water out! Once again – you’ve come a long way to get the images you want, why compromise on probably the cheapest part of the whole event – a waterproof bag or rucksack. I made a point of buying a load of desiccant on ebay in handy plastic perforated plastic cases – much more efficient than the little ‘tea-bags’ you normally find in products, given the much larger task at hand.
Overboard waterproof bags and cases http://www.over-board.co.uk/
Ebay: search under ‘Silica Gel Desiccant Humidity Moisture Absorb Box Reusable Packing Supply’
Cleaning your kit beyond blowing dust from the lens is not the easiest thing to do (as you’re rarely in a dry enough environment) and I’ve found that making sure the camera sensors are clean prior to departure and then ensuring that the kit is protected as much as possible when out has been adequate protection against damage or spots on the pictures. A few minutes prevention is worth hours of post-processing!
Equipment – kit
I’ve always used Nikon kit, purely a personal preference, so your choices may vary slightly.
Before buying a second body (the original was a Nikon D700 -the first Nikon full frame sensor DSLR camera), I debated at length over whether to purchase a modern still/movie DSLR in order to expand both file size and capabilities but in the end opted for a good second-hand duplicate of the D700. I’d decided that, a)I am completely familiar with the old body and ease of switching between bodies on if in a hurry would be more fluent b) if I was going to embark on movie production it would require a whole lot more investment of time in learning the new skills that would provide me with the quality and standard of work that I would be happy with.
Together with my two Nikon D700’s I took to Ecuador and Galapagos:-
Nikon Zoom-Nikkor G AF-S VR IF-ED 200-400 mm f/4.0 Lens – really useful everywhere
AF-S Nikkor 70-200 mm f/2.8G VR 2 Lens – good in Galapagos and Quito
Nikon 14-24mm F2.8G Af-S Ed Zoom Nikkor lens – useful in Quito but not much else
I do have UV filters where possible as permanent fixtures for protection on my lenses.
My durable Crumpler rucksack carries most of the kit and my strong Manfroto monopod was useful in the forests where lower light was the norm and on the kayak whilst Cherrie paddled!
Once ashore in the Galapagos I tended to stash the bags and just carry the two cameras/lenses and monopod. In the forests we were normally setting out from a dry location (lodge or hotel) so I opened the bag outdoors and left it at the lodge. A bit of planning by asking about the day’s trek or landing helps to better plan how you carry stuff. I always seem to be laden or – correction – Cherrie always seems to get laden with what I don’t need but she’s becoming less willing as the years go by, so I have to think more carefully before setting out as my gear weighs a ton after an hour or so..
As regards ancillaries I take enough memory cards to allow for storage of the whole trip in RAW without having to free up space and a storage device (I use a laptop and separate hard drive) to duplicate the shots after each outing as insurance against loss or corruption of the cards. At the time of writing there doesn’t appear to be a good hard drive with monitor to download to from the camera, as this would be much more favourable than carrying a laptop.
You’ll need plug adapters and a multiple-socket power strip for your lodge – power will generally be available during daylight hours. Spare batteries for the cameras are a must for obvious reasons.
Other than a heavy duty blower brush for dispelling surface dust, that’s it. I’ve already said that I don’t use flash; partly because I’m never over enamoured by the results, partly because I see it as an insensitive intrusion into a natural environment (I know that I am and so is the transport but we all draw a line somewhere!)
It’s worth mentioning here that the only problem I had with weight limits was in London with the main carrier over hand luggage – which is all my camera kit and laptop/hard drive etc. It meant retrieving my hold luggage so that I could pack the laptop and ancillaries in it to reduce carry-on weight – all a bit of a pain. I had no problem with carry-on luggage (with all earlier items restored to it) in the smaller feeder aircraft between Quito/Guayaquil/San Cristobal and back!
DO check on allowances before you pack!


 Let us help plan your own inspiring journey to Galapagos and throughout Central & S. America
Why not download the TLC World guide brochure or give us a call today on 01202 030443, or simply click ‘enquire’ to submit your own personal itinerary request


